EPISODE #52- SATURDAY SEPTEMBER 11, 2010
Hope everyone had a great
Labor Day weekend. We had a great week off and are now starting to think
about the fall. We are visiting some nurseries this week to celebrate
the GardenPalooza: The Tour event; we are
gearing
up for the cooler weather and the return to fall. If you are looking for
plants to bring indoors your local garden centers can help you out. We
are
also thinking about those projects around the house. We have a great one
in
today's show, replacing your faucet. Enjoy!!
Bar Cart Table
We did a 'presto-change-o' this week at
Ste. Maine
(503-232-1880) in the Westmoreland- Sellwood area this week. We met with Erin who showed us how
to
set up a portable bar on a cart that they carry. She recommended that
you
use a two-shelf cart to hold all the items you need to entertain. Organize
the items you would use the most on the top shelf and everything else
underneath. This will make your work of entertaining easier.
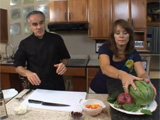
Watermelon Tomato Salad
It is the end of summer and that means watermelon time, but you
may be tired of having your watermelon the same old way all the time.
Chef
David came up with a tasty recipe that uses watermelon and some of your
other garden veggies in a salad! He started by marinating diced
cucumbers
and onions in a mixture of vinegar, salt, sugar and cayenne pepper.
While
that is resting you can prepare the rest of your ingredients. David
showed
us how he slices the watermelon. He cut of the ends and shaves the sides
off the melon. This gives him an entirely pealed melon to work with. He
then sliced the melon into 1 inch squares. He also sliced up some tomato
and olives for the final assembly. Now you can put everything together.
We
mixed the tomatoes, melon chunks, olives and some diced basil and mint
leaves in a big bowl. That was topped with feta cheese and 2 tablespoons
of
olive oil. David recommends that you make this right before you serve
it.
The watermelon doesn't store well and can break down over time. It is a
tasty treat made with an old summer time favorite.
Check out the recipe
here.
Replacing Your Faucet
Robin is looking for a change! In her bathroom, that is. She
was tired of the 'look' and she wanted to change the décor, and one of
the
easiest ways to change a bathroom is by changing the plumbing. We mean
the
faucet. Replacing a faucet is easy, or so we've been told. To learn how
to
do it we stopped by
George Morlan
(503-224-7000) to get some tips from Dave Charvet.
Dave
had a lot of questions for Robin before she made her decision. First
what
type of sink did she have? There are different combinations of holes in
the
top of the sink for the pipes. There are 4 inch, 8 inch and single hole
models of sinks. Know your measurements! Second, determine the finish of
the faucet. What style do you want, and don't forget the rest of your
hardware; towel bars, tub and shower fixtures may also need changing.
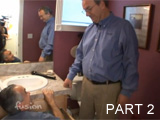
Now, time to install our new faucet. First shut off the water
under the sink and disconnect the water supply tubes. Use a bucket to
catch
the water that leaks out of the tubes. Next disconnect the pop-up
assembly
which operates the drain. Remove the clips and screws that hold the old
faucet on to the sink and lift it out. You should have the faucet
removed
now, but we still need to remove the drain. The new drain will have the
same finish as the new faucet so you need to do this so they both match.
Remove the trap from under the sink. There will be a lot of water in
this
so make sure you have a bucket handy. Take the rest of the pop-up
assembly
off and then loosen the nut and remove the old drain assembly from the
sink.

![]()
But this cart can have other functions as well. With a few
changes you can change the cart into a bedside table. We removed the
glasses and alcohol from the cart and replaced them with a lamp, clock,
books and accessories. This is a great example of using a piece of
furniture for 2 uses. This cart can be used for your bedside then pulled
out for the next party! What a great idea from the 'idea' people at Ste.
Maine.![]()
![]()
Next we moved to tools. There are specific tools that will help
make the job easier. Dave met with David in the parts department to help
him find the right tools for the job. The first tool we saw was a 'basin
wrench'. This will allow you to tighten and loosen the nuts around
fixtures
in those tight spots. You may also need to replace the shut-off valve
under
the sink and the water supply tubes. Check the condition of those before
you make your first trip to George Morlan. Know the size of those tubes
as
well by measuring the connector. You will also need some Teflon tape,
silicone sealer and plumber's putty to help seal your connections when
you
install everything.
The sink should be bare of all hardware now. Use some cleaner
to remove the hard water stains before you begin to install the new
faucet.
To start, insert the new faucet in the hole and line it up so it is
straight. Then make sure your fittings are ready for the water supply
lines
at the bottom of the faucet. Next, install the new drain. Be aware of
the
opening for the overflow. It has to line up with the overflow discharge
holes in the sink. Adjust the drain so it fits snug and use some
plumber's
putty to create a watertight seal. Install the new pop-up assembly and
we
are ready for the next step; reconnecting the water supply. Use your
Teflon
tape on the new connectors and then attach them to the water supply
tubes.
Install the new drain at this time as well. Once everything is assembled
and tightened you can turn on the water. Run the water for 1-2 minutes
and
check for leaks. Tighten nuts and use more putty if you see leaks.
This is a job that can be done by one person in a weekend. If
you want to try doing this we recommend that you stop by George Morlan
to
get the faucet, tools and tips you need for the job. They really made it
easy!


Website design and content ©2009-2010 Gustin Creative Group.
Please send website inquiries to
gustingroup@comcast.net.
This page last modified
September 17, 2010.


