|
|
EPISODE #85 -
SATURDAY AUGUST 6, 2011
Hope the
summer is treating you well! The days have been great, not too
hot and not too cold. I know that some people would like a
little more heat, but I think this weather is perfect,
especially since I just returned from Florida and the heat and
humidity was deadly! It is so good to live in the Northwest.
Enjoy these days, we are about half of the way through summer
(it ends in the middle of September) and we will have the rain
and cold back soon enough!
Ste. Maine Filling a Wall
One of the
quickest ways to decorate your home without breaking the bank is
to fill your walls with special décor items. To get some ideas
on how to do that we stopped by
Ste. Maine
(503-232-1880) to chat with Erin about what she would suggest.
Erin mentioned that a lot of people fill their walls with
expensive pieces of art, but there are so many more options. On
one wall they had used a mirror and a couple of wall sconces.
By using a mirror you can make a room look bigger, or even
showcase something else in the room. You want to make sure that
it doesn’t reflect a blank wall or isn’t placed too high on the
wall. You can use an old mirror to give the wall some
character, or even a convex mirror to give a unique ‘distorted’
appearance to the room. The sconces were vintage and were
originally designed to hold candles but they looked great
without them. They also gave a 3 dimensional look to the wall.
That depth seemed to give the wall a little more character too.
Next we moved across the room to see a series of 3 framed
prints. What made these prints unique was that they were just 3
pieces of decorative wall paper. Erin mentioned that you could
also use drawings, interesting cards or even old sheet music.
The key is the framing. Make sure you use a good frame and have
a professional do the framing; it will make all the difference
in the world. One other tip, use an odd number of frames to
make it work. If you would like some more tips of decorating
your wall, stop by Ste. Maine in Westmoreland for some help.
Painted Hills Beef
When you are
in your grocery store, do you know where you food comes from?
If you buy
Painted Hills Natural Beef (1-877-306-8247) you know exactly
where it comes from. We met up with Merhten Homer, President of
Painted Hills to learn what makes this beef so different.
Merhten told us it is the way it is grown. These cattle are
raised with no added hormones, no antibiotics and a 100%
vegetarian diet. The meat is ‘choice grade’ the best that you
can buy. Merhten also gave us some grilling tips too. He
recommended that you don’t over-cook the beef. If you are
grilling, you are looking for a medium rare piece of meat. To
get this, all you have to do is get your grill to a medium
heat. Cook your steak until it gets shiny on one side. This
means that the moisture and natural oils in the meat have cooked
to the surface. Flip it over and repeat on the other side, and
you are done. We found a great selection of Painted Hills Beef
at
Barber World Foods, (503-244-0670) a great market near
Capitol Highway, but it is also available at select markets
around the state.
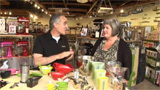
Kaboodle Measuring Items
Does your
kitchen ‘measure’ up when it comes to cooking or baking? I
know, it is a little pun, but we are
talking about measuring devices and how they have changed in the
kitchen. We stopped by
Kitchen
Kaboodle (503-643-5491)
and talked to houseware buyer Maryann Samsa to see what is new
in the kitchen. First she told us about liquid verses dry
measures. You can’t just use one type of measuring device to do
both liquids and dry ingredients. Using the
right measuring device will make your cooking and baking more
successful!
We started
with measuring cups. Pyrex has changed their design to a more
flaired cup that will allow you to read the measurement more
accurately without bending down to see the side of the cup. OXO
has taken it one step further by having a measuring guide on the
inside of the cup so you can see the correct amount by just
looking inside the cup. Chef’n has come out with silicone
measuring cups that are microwave and dishwasher safe and they
are in the shape of a beaker. They won’t break or rust and when
you pour, you can just pinch them to create your own spout for
pouring. Very convenient! Other measuring cups included a lip
on the front of the pour spout so they could hook onto the
mixing bowl and you can pour ingredients without spilling!
We then
moved to measuring spoons. A lot of the new designs for
measuring spoons are oval, so you can use them with spice jars.
The newer designs allow you to place the spoon inside the jar so
you don’t spill spices as you measure. Another set of spoons
had measurements for a drop, smidgen, pinch and a dash. These
are measurements that can be mentioned in older cookbooks and
now you have an official measure for that. This set also comes
with a leveler for more precise measuring. We also saw some
measuring spoons that are magnetic so you can keep them together
and even attach them to your refrigerator or stove if needed.
If you are looking to save space, they now have collapsible cups
and adjustable spoons so you can cut down on the number of
measuring devices you need. They even have a device for
measuring goopy and sticky items like honey or peanut butter.
If you have kids and you want to get them involved in the
kitchen they have the ‘Head Chef’ measuring cup in the shape of
a little man and some color coded measuring spoons and cups.
The final
item was a measuring cup that was also a scale. This is great
if you have recipes that call for a weight instead of a
measurement. Check out all the different measuring devices at
Kitchen Kaboodle at any of the 5 Portland metro area stores.
Quick Tip - Cleaning Stemware
Enjoying
your favorite wine is a wonderful experience. But if you have
noticed a
funny taste, the problem may not be with the local vintner, it
may be your stemware! We dropped by
Metrovino
(503-517-7778)
to chat with Todd Steele to learn why your wine may be tasting
so ‘interesting’. Todd told us about the importance of clean
stemware. ‘Clean’ stemware still could have the taste and
fragrance of the laundry detergent that you
use on your towels. Todd recommends that you keep a supply of
clean and lint-free towels around your bar or kitchen, just for
your wine glasses. Metrovino uses lint-free microfiber cloths
reserved just for polishing their glassware. Fragrance free
softener and detergents are very important! Treat your glasses
right and they won’t come up smelling like roses!
Uses for Vinegar
Vinegar has
a strong smell and is a useful ingredient in the kitchen but it
also has a lot of uses other than cooking. It can also be used
as a cleaner. If you have lime or calcium buildup in your
coffee maker or dishwasher you can just run a cup of vinegar
through the machine to get rid of that buildup. Of course you
should remember to cycle more water through it to get rid of the
vinegar taste once you are finished. If you have coffee or
berry stains in your cups and bowls, a little vinegar will
easily remove them. Speaking of removing, it can also be used
to remove those pesky price stickers off of plates and cups. If
you have smells coming from your garbage disposal you can freeze
some cubes of vinegar and then run them through you disposal and
it will kill the bacteria and deodorize the disposal as well.
Replacing a Dimmer Switch
Replacing a
light switch can seem intimidating, but if you follow the right
steps it can be done in just a few minutes. First of all, read
all the instructions before you tackle any project! Today we
showed you how to replace a dimmer switch. Robin shut off the
power at the breaker panel before David took apart the old
switch. Once he had it apart he double checked that the power
had been shut off by using a voltage meter. You can pick one up
at your local hardware store. He then removed the old switch by
unscrewing the wire nuts. The new switch had 4 different
wires. Most switches will have 3. For an ordinary switch you
will find a red, black and green wire. For this one we had an
extra wire. This extra wire was there in case we had another
switch that would operate the light from the other side of the
room. We just kept the extra wire capped. In attaching the
wires, the wall had a black, white and a single copper wire.
The blacks were tied together, the red from the switch went to
the white in the wall and the copper was the ground and that one
went to the green wire in the switch. You will want to keep the
wires short so that they all can fit inside the junction box
once you have them tied together with wire nuts.
Once
everything is back in the junction box you will want to turn on
the power and make sure the switch works before you put all your
screws back. If it doesn’t work, double check your
connections. If it does work go ahead and screw everything back
into the wall and put on your switch plate to cover everything.
If you run into problems or you feel like you are in over your
head. Take a picture and return to the hardware store to get
some help or call a certified electrician for some professional
help! |
 |
||||||||||||||
|
Website design and content ©2009-2011 Gustin Creative Group.
Please send website inquiries to
gustingroup@comcast.net. |