|
|
EPISODE #124 -
SATURDAY AUGUST 18, 2012
Wow, it sure got hot in a
hurry! The most important thing during this time of year is to take care
of yourself. The heat can sneak up on you. It doesn’t take much before
you are hurting. If you can’t remember when you had a drink of water, it
has probably been too long. That is true if you are outside OR inside.
It is easy to get overheated, even if we don’t get over 100 degrees!
Take care of yourself and get those projects done early in the day!
Bed
Makeover
Like a lot of things in your home your bed
can really benefit from a makeover! To help us make a seasonal change in
the bedroom we stopped by
Ste. Maine
(503-232-1880) in the Westmoreland/Sellwood area. Elizabeth joined David
to show him how to do it, but before we got started he needed a little
education about the bed linens and what they are there for. We started
with the headboard. It is great to have so your pillows and other
decorations don’t slide off the top of the bed. As a bed-covering we had
a quilt which will work for most of the year here in the Northwest. If
you need a little more coverage you can add a duvet. Usually this stays
folded at the bottom of the bed. At the bottom is the ‘dust ruffle’,
this covers the box springs and the metal frame of the bed and makes a
nice accent to the look of your bed. There were numerous pillows on the
bed and they were covered by shams and Euro Shams. The Euro shams are
large coverings that protect the larger decorative pillows. These can be
used for sleeping but generally they are just decoration. The regular
bed pillows also have a sham (covering). These protect the pillows and
like most of the coverings, they can be changed to match the season. The
bed we saw was a classic white bed that looked light and summery. Then
Elizabeth and Erin took over and with a few changes of covers and the
duvet, they created a more ‘earthy’ appearance. They kept the ‘white’
look which is more neutral than other colors, but added a splash of
color to really change the look.
Steak
Romaine Salad
This week we return to the Oswego Grill
(http://oswegogrill.com, 503-352-4750) to visit with Chef Genardo Zurita
and get another one of his great recipes that you can try at home. Chef
Genardo whipped up a Romaine salad with grilled steak. The Oswego Grill
uses a hard-wood fired grill in their kitchen which burns mesquite and
cherry wood and adds a touch of flavor to just about everything. First
he started with a steak which is only seasoned with salt and pepper and
grilled for 3 minutes on each side. He also took a head of romaine
lettuce and cut it in half. He coated the romaine with some olive oil,
salt and pepper, and grilled that at the same time. The lettuce is
grilled for 2 minutes on each side.
Grilling Gadgets
Washer
Water Saving Tips
Water use in the house is hard to track and
even harder to cut back on. One of the areas that use the most water is
the laundry room, specifically the washer. The only way to cut back on
water is to do less loads of laundry, right? Wrong. There are new water
efficient front-loading washers available on the market. With these new
models you can cut your water usage in half, from over 40 gallons a load
to about 20 gallons. A few other benefits to the front load models; they
get your clothes cleaner by mixing the detergent, clothes and water
better. They are also easier on the fabrics, so your clothes will last
longer. And finally, you will use less energy in your dryer as well,
since these front loaders spin more water out of the clothing! You can
also save money by taking advantage of energy credits and rebates. For
more information and water saving tips check out the Regional Water
Providers Consortium website at
www.ConserveH2O.org.
Garbage
Disposal Fix
It always happens… usually at a dinner party
or some other big event. The garbage disposal gets stuck and it doesn’t
work. We stopped by
George Morlan
(503-224-7000) to get some tips for fixing it from Dave Charvet. He told
us the number one reason for the clogs in the first place… not enough
water! You have to be running water through the unit to make it work at
its best. Water first and then add the garbage (don’t pack it full
either). The sound will also tell you when it is empty. Now if you have
a clog the first thing you need to do is to shut off the power. Not just
at the switch on the wall, but also at the circuit breaker in your power
box. Next try to dislodge the clog from the top. Don’t use your hand;
there are sharp objects in there! Use a broom handle or the handle from
your plunger. A lot of times that will knock the object loose and it
will work again. If you hear a hum that means that there is power to the
unit. If you hear nothing you may have tripped the circuit breaker on
the unit itself. Open the doors to your cabinet and look under the unit
for a red button. This is the breaker switch and it may need to be
reset. While you are under the unit you may also notice a hole in the
center of the unit. This hole is for an ‘Allen wrench’ or ‘hex key’.
This will allow you to turn the blades from under the unit and that
could help in breaking a clog loose. If any of these options fail, call
a plumber! It is better to have a professional take care of things than
to ruin a dinner party with a trip to the hospital. For all your
plumbing questions you can do what we do, check with the experts at
George Morlan Plumbing!
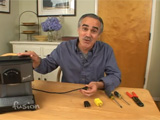
Fixing a
Plug
If you have an appliance that doesn’t seem
to be working, before you toss it out, check the electrical plug. For a
lot of our home appliances the plug may be the problem, and replacing
the plug may be an easy chore for the homeowner. David showed us how
easy it is to replace a plug and get that appliance up and running
again. Most of the time the plug fails because we pull on the cord and
not the plug itself. If the wires become exposed you should cut the plug
off and replace it. The first thing you want to do is check the
appliance to make sure that you know what the power requirements are for
the unit. The appliance that we had required a 15 amp/125 volt plug.
There are lots to choose from at the hardware store so we looked for one
that was designated for a small appliance. As far as tools go, you
really only need a couple of items. You will need a Phillips or flat
head screwdriver and a wire stripper. To replace the plug, go at least 1
inch past the damaged area on the cord. Cut the old plug off there. Then
strip the cord down about 1 and ½ inches per the instructions on the
plug package (always follow the directions). Your wire will generally be
made up of 2 different wires and the insulation on one of them could
have a silver color on the outside. This silver color will mean that you
will attach that to the silver terminal on the new plug. The other wire
will go on the brass screw (terminal). Make sure that your wires are
secure on the terminals and that there is no pinching of the wire when
you close the new plug. Test your plug in a GFI circuit to make sure it
works and you should be done. If you have any problems, check with your
local hardware store. Remember you are dealing with electricity and it
should be treated with caution and respect. Be safe and you will have a
working appliance again in no time. |
   
 |
||||||||||||||
|
Website design and content ©2009-2012 Gustin Creative Group.
Please send website inquiries to
gustingroup@comcast.net. |